Village Green Festival 2015

journal-exhibition4

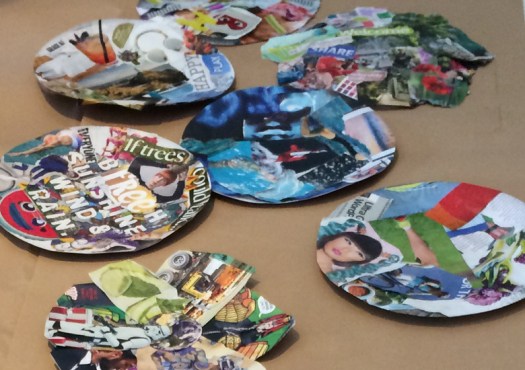
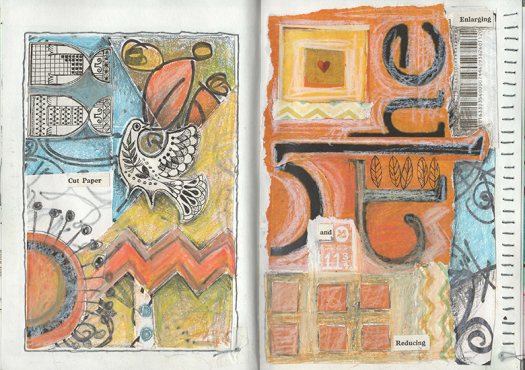
Following on from the Creative Journal course I’ve been attending, at Metal Southend, our group was given the opportunity to display our journals and ‘altered books’ at the Village Green Festival on 11 July 2015 in Chalkwell Park. We jumped at the chance.

Metal, with the help of funding, has recently renovated an old stable block into an art school. Located in the centre of the park, with views of the gardens and the sea beyond is where our exhibition was to be held. We visited the venue a few days earlier to drop off our sketchbooks and to check out the space and we were also allocated 1 1/2 hour slots in which we would be invigilating the exhibition and explaining the project to the visitors.

journal-exhibition1

On the day of the festival, I arrived in time for my 12pm start.

journal-exhibition2

We set out the sketchbooks on tables to encourage visitors to handle them. The work is very tactile and we wanted this to be a fundamental part of the user experience.

The festival only opened at 11am, so the exhibition was quiet to begin with, but people were soon wandering in to have a look.

journal-exhibition5

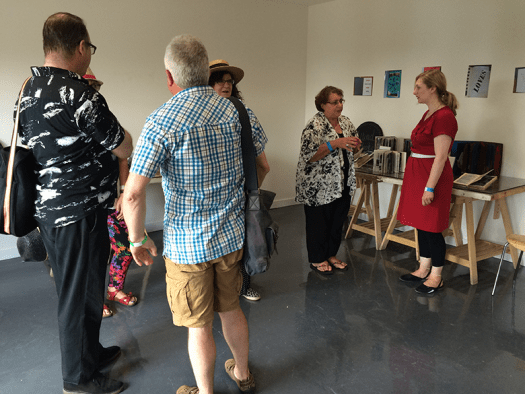
We had visitors of all ages dropping by…

journal-exhibition3

We all thought the exhibition was a huge success and everyone who took part really enjoyed the experience.

village-greenThe rest of the day was spent enjoying the sights and sounds of the festival, including this Indian acrobatic act which was breathtaking!

Happiness mandala workshop

happiness-mandalas

I belong to a local Meetup group that supports small businesses and self-employed people. We meet on a regular basis and its a great opportunity to share ideas or to get advice from like-minded people.

Having been inspired by a couple of recent courses I’d attended I thought I would try running my own creative workshop at one of the Meetup sessions.

mandala-group4

The task I set the group was to make their own  mandala that would represent happiness to them. The word mandala can be translated to mean ‘circle’ and it has been used for centuries as a meditation tool. I chose the theme of happiness as we can sometimes forget to be happy and yet it has many benefits which can lead us to be more productive and effective in our lives.

Using magazines, I asked the group to quickly pick images that they liked, it was important that they used their gut instinct, therefore not allowing themselves to think or question their choice.  Once they had a few images they glued them onto their plate, starting in the centre and working outwards, overlapping the edges. The edges were then trimmed to make the mandala. These are some of their lovely creations:

mandala-2

Having created their own piece of happiness I suggested they take their mandalas and put them somewhere where they would see them everyday as a gentle reminder to be happy.

Mosaic garden table

garden-table

I bought this table from our local antiques centre, Battlesbridge, as it was a perfect candidate for my next mosaic project.

mosaic-flowers

I bought a few sheets of mosaic tiles from B&Q and I started to play with the shapes and colours to get some ideas of what pattern I could make. I quite liked these Mackintosh-style flowers.

mosaic-table-development1

The table doesn’t have a central hole, so the first step was to measure out exactly where this was. I then began placing a red border around the outside of the table and added the four flowers, then I created the circle in the centre and added the leaves.

mosaic-workspace

I was working in my new crafty shed, which made the job so much easier and it was nice to shut the door on the mess.

mosaic-table-detail

Once I had mapped out the outlines of the pattern I began to fill in the gaps with smaller pieces using a mixture of glass tiles and broken mirror. The pieces were then glued down and left overnight to set.

mosaic-table-detail2

The final step was to grout the table. I always prefer the look of slate grey grout and I used one that is frost and water resistant.

mosaic-table

This is the finished table, which is now sitting pretty in my garden.


Creative journal course

creative-journal1

For the past six weeks I’ve been attending a creative journalling/sketchbook course at Metal in Southend. Having completed an art foundation course and a degree in textile design, over 20 years ago (gulp!), I haven’t really kept a sketchbook since then and I really wanted to reconnect with the process.

The course was run by Heidi Wigmore, a local artist and fine art lecturer. With 18 people attending this was a large course and the students demonstrated a wide variety of styles and abilities.

Each week we explored a different approach including repetition, absence and sensory deprivation. The purpose of the course was to help develop your own personal style using the methods suggested and to be as free as possible  i.e. not over-thinking or planning the outcome but allowing it to happen. All in all a liberating experience and I immediately connected back to my previous studies but with a fresh approach.

creative-journal2

These are some examples of the work I produced, which demonstrates a strong pattern, collage and mixed-media style.

creative-journal3

Examples of all of the work produced will be exhibited at Metal @ Chalkwell Park from Easter 2015. There is also another six week course starting 14 April 2015. You can read further details on this Journal series 2 flyer.

Crochet granny square cushion cover

granny-square-cushionI’m not really a big fan of the granny square (preferring a more contemporary crochet look) but recently I got the bug to give it a try.

I’d bought six 100g balls of Woolcraft DK yarn in various colours and was looking for a suitable project. I had a spare cushion inner that I wanted to cover and I followed a pattern that I’d found in one of my crochet books.

Once I’d made several rounds I noticed that the square was developing a slight twist. This, apparently, was due to me adding an extra chain between the granny triangles and extra chains on the corners doh! Once I stopped doing this the shape became more square (note to self).

For the back of the cushion I had planned to make this quite plain, using treble stitches in the cream. However, as I had only bought one ball of each colour I soon realised that I was going to run out of cream. I opted to add a row of stripes to the middle of the cushion and then I could finish off with cream.

granny-square-cushion-progress2

My preferred style for the back of a cushion is to create a flap that is closed with buttons. In my button stash I found a selection of colourful ‘smartie’ buttons that were a really good match. I positioned and stitched these in place.

granny-square-cushion-buttons

granny-square-cushion-back

granny-square-cushion-front