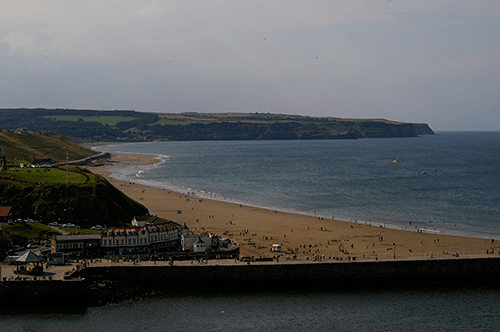
A trip to Yorkshire

The weather this summer has been gorgeous! It was so nice to be able to take a short break in the UK and have such warm, sunny and dry days. These are a few pics from my visit to Yorkshire.

Whitby

whitby-town
Whitby town centre
whitby-bay
Whitby Bay
whitby-abbey1
Whitby Abbey
whitby-gravestone
Weathered grave stone

Scarborough

North Bay, Scarborough
scarborough-beach-huts
Scarborough beach huts
Reflections
Reflections
Wood carving in Peasholm Park, Scarborough
Ann Bronte's grave stone
Ann Bronte’s grave stone

Harrogate

A visit to Harrogate wouldn’t be complete without dropping in to Betty’s Tea Rooms for a cup of tea and a slice of cake!

Bettys Tea Rooms
Bettys Tea Rooms

Bolton Abbey

Bolton-Abbey
Bolton Abbey
Bolton-Abbey-detail
Detail of Bolton Abbey


Bolton-Abbey-stepping-stones
Stepping stones across the river
Bolton-Abbey-river
View along the River Wharfe
Bolton-Abbey-coin-tree
Weathered coins pushed into a tree trunk

My craft shed – part 2

Well, having (patiently) waited for my shed to be made the delivery day finally arrived! As part of the shed company’s service, they also deliver and construct the shed for you (win win) and it takes less than 30 mins!!? So we timed them…

new-shed-base

They laid the floor in less than 10 minutes…

new-shed-construction

To construct three walls took a further 15 minutes…

new-shed-complete

And the shed was completed in under 30 minutes. Awesome! Obviously for them to achieve this they had built everything offsite and it was a simple bolt-it-together job. I say simple, but I’m glad they did it and not us…

new-shed-inside

Then for the fun bit. I painted the inside white, to keep it light and bright, wanting it to resemble an art studio. I really like the extra window at the end, which not only provides additional light but also means I can keep an eye on the chickens!

new-shed-interior

This was my first attempt at loading up the shed with my crafting bits and bobs. It didn’t flow very well and I felt boxed in. A bit of rearranging will fix this.

new-shed-fudge

But in the meantime, the shed certainly has someone’s approval!

My craft shed – part 1

old-shed

This had been my little garden shed for a few years. At 4′ x 5′ it was the perfect size to fit the existing foundations of the previous shed and big enough/cheap enough to hold all the usual gardening/decorating stuff.

However, due to me regularly taking over the kitchen table to do my craft work (and damaging the table slightly – eek!) plus taking over the limited storage space in our flat with my crafting tools and other paraphernalia, we decided it was time to get a new, slightly larger shed that I could use as a crafting space and for storage. Yay!

old-shed2

We set to work on dismantling the old shed, only to discover that the shed had been holding up the neighbour’s fence!  We removed the collapsing fence panels and thankfully the neighbour’s landlord did eventually repair the fence.

As the new shed was going to be bigger (approx 5′ x 11′) we needed to extend the base. After reviewing our options it seemed that the simplest solution was to use an interlocking plastic shed base system. We calculated how many we needed, ordered a few extra, and they arrived a couple of days later.

old-shed-base

The first job was to level the ground using a rake. Its worth taking time over this and walking over the ground to make sure it is compact. Then once this was done we laid weed control fabric on to the soil. We measured and marked out exactly where we wanted the shed to be positioned and then lay down the grid squares before interlocking them together. Using some of the ballast we had removed at the levelling stage we filled the grids to create a solid base. This method was so much easier and quicker to lay than concrete and it does mean it can be easily removed at any time in the future, plus the results were great.

The next step was to order the shed. Having researched many, many shed companies, during the previous weeks, we finally opted for a local business that would build you a bespoke shed exactly as needed. Perfect! We met with the company, discussed our requirements and placed our order. The only downside is the 6-8 week wait…noooooo. I guess that is the price you sometimes pay for using a small family business with a strong reputation. Oh well, for the next couple of months I will just need to be very patient. At least the cats can enjoy the short-cut into next door’s garden lol.

iPhone crochet covers

orange-iphone-cover

I got a new iPhone earlier in the year and knowing how ‘fragile’ they can be, I bought a protective screen cover and case for it. Although this did help, I still managed to scratch the phone while it was in my bag, which I had carelessly thrown in with keys and various other objects. To prevent any further damage I set to work on creating a protective crochet sleeve.

orange-blue-iphone-cover

I knew how I wanted it to look like and started to create my own pattern. It did take several attempts to get the fit just right (using the Snow White approach: this one is too small…too large…ahh just right!). I then tried various colour combinations and also included a hole for the headphones on some.

green-blue-iphone-cover

Finally, the finishing touch was to add one of my polymer clay buttons to the front, et voila! A smart, protective cover to keep my phone safe.

Crochet block cushion

I’ve been looking for projects to use up my stash of leftover yarns. I really like making blocks as they are easy to carry around and fun to make. I found a pattern for a blanket made up of crochet blocks in Crochet Workshop by Erika Knight and used this as my starting point.

crochet-block-cushion-front

Using a colour palette of blues, greens and stone I made 25 squares, enough to make an 18″ cushion cover.

crochet-block-cushion2

I joined the squares together using a contrasting dark grey yarn and DC crochet stitches.

crochet-block-cushion-back

For the back of the cushion I used the grey yarn and a simple ‘V’ crochet stitch. I did run out of the grey wool part way through (and I hadn’t made it wide enough), so I used the colours on the front to make a striped edge and fold over top.

crochet-block-cushion-back2

I fastened the flap with five grey Fimo buttons that I found in my collection et voila!