Woodland Crochet-A-Long (CAL)

Being a newbie to the ‘Crochet-A-Long’ (CAL), I found the Woodland Blanket CAL on the Attic24 blog and thought it would be a good project to try.  The wool was a Christmas present from my mum and when it arrived it sat under the Christmas tree…waiting…then on Christmas day I could finally open it. Yippee!! What yummy colours!!

The pattern was due to be released on a weekly basis, starting in January, via the Attic24 blog. So, with a week or two to go I had some free time on my hands. Firstly I decided rewind the balls of yarn into cakes. Its just a personal preference but it gives you the opportunity to check the wool for any problems before you start; and it makes it easier to pull the yarn from the centre, so the ball doesn’t bounce around.

Secondly, I made my colour tags, so that I could easily identify my colours as I’d removed the ball bands.

Then in January the first week of the pattern was released. I made my tension piece and began my foundation chain. Both steps took a few attempts to get right.

The pattern was a variation on a ripple stitch and I was surprised how easy it was to do the pattern wrong and it wouldn’t be apparent until 2-3 rows along! I learned a new word during this project, ‘frogging’. Basically its a word for undoing your work, i.e. ‘rip it, rip it’. I lost count how many rows I had to undo.

Still, I persevered and placed markers along the row and counted, counted, counted! By the time I was half-way through the blanket I finally got into the rhythm of the pattern and began to enjoy it more.

The number of pattern rows released each week was more than I could comfortably keep up with but thanks to a ‘spare’ week at the end I managed to get myself back on track.

This is my finished blanket! Its so soft and warm – I absolutely love it!

I live in the UK and it couldn’t have been finished at a better time…literally just in time for the ‘Beast from the East’. Freezing temperatures has meant this blanket has been put to good use already.

I’ve now started knitting some more socks. I just love winter accessories!

Silk Painting Workshop at the Embroiderers’ Guild

I haven’t tried silk painting before, so when I saw my local Embroiderers’ Guild were running a workshop I thought I would give it a try. The session was run by textile artist, Kirsten Yeates, from Denmark.

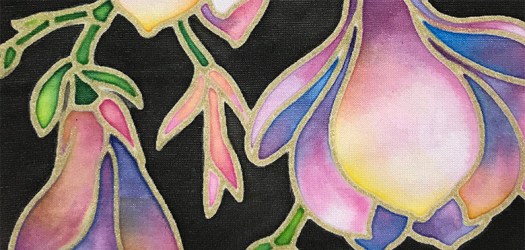
Kirsten began by handing out pieces of silk that had designs pre-drawn on them using gutta – a technique that creates a boundary that the inks can ‘bleed’ up to. Apparently it can be quite tricky to draw smooth lines of gutta so, as a beginner, it was ideal to be able to start with these pre-drawn examples. We were then given a short demonstration on how to apply the inks. A fine paintbrush and cotton bud is useful if you are painting a detailed design and a thicker soft brush if you need to cover larger areas with a wash of colour.

The silk painting inks are very concentrated and produce a really vibrant colour on the cloth. Painting with inks looked easy but the inks dry quickly leaving a hard edge of colour. To prevent this from happening you can either damp the fabric slightly with your brush, before applying colour, or water the inks down.

I’m more familiar with watercolours, so by diluting the inks I was able to create the effect of the colours softly blending in to each other. Here is the piece I made, before and after…

In a short two-hour session, these are some of the lovely pieces that the group produced.

For more information on the Embroiderer’s Guild, or to find your local branch visit https://embroiderersguild.com/

Crochet granny square cushion cover

granny-square-cushionI’m not really a big fan of the granny square (preferring a more contemporary crochet look) but recently I got the bug to give it a try.

I’d bought six 100g balls of Woolcraft DK yarn in various colours and was looking for a suitable project. I had a spare cushion inner that I wanted to cover and I followed a pattern that I’d found in one of my crochet books.

Once I’d made several rounds I noticed that the square was developing a slight twist. This, apparently, was due to me adding an extra chain between the granny triangles and extra chains on the corners doh! Once I stopped doing this the shape became more square (note to self).

For the back of the cushion I had planned to make this quite plain, using treble stitches in the cream. However, as I had only bought one ball of each colour I soon realised that I was going to run out of cream. I opted to add a row of stripes to the middle of the cushion and then I could finish off with cream.

granny-square-cushion-progress2

My preferred style for the back of a cushion is to create a flap that is closed with buttons. In my button stash I found a selection of colourful ‘smartie’ buttons that were a really good match. I positioned and stitched these in place.

granny-square-cushion-buttons

granny-square-cushion-back

granny-square-cushion-front

Crochet bobble blanket

crochet-bobble-blanket2As we live in an older property, it can get a bit chilly in the winter months (in fact anytime from Autumn to Spring really). So the big project for 2014 was to make a large winter woolly blanket for our bed to keep the cold at bay.

I’d seen this bobble stitch, which I really liked, and decided to use this to create a pattern. We have a king size bed and I wanted the blanket to hang over the edges, so having measured the bed I decided to make 36 squares measuring approx 35cm x 34cm each (ok, almost square…) in a 6×6 layout.

I wanted to use the same pattern stitch for each square and use several different colours. Making individual squares definitely made the project more manageable as opposed to creating one large piece (especially with a kitten trying to ‘help’!).

This is the yarn I used, which are all aran yarns with 75% acrylic and 25% wool:

  • Hayfield Bonus Aran – 0822 Blue Slate (dark grey) 2 x 400g balls
  • Hayfield Bonus Aran – 821 Spruce (green) 1 x 400g ball
  • Hayfield Bonus Aran Tweed – 781 Flock (pale blue)  1 x 400g ball
  • Hayfield Bonus Aran Tweed – 744 Bamburgh Blue (turquoise) 1 x 400g ball
  • Wendy Aran – 705 Albatross (light grey) 1 x 400g ball
  • Wendy Aran – 463 Grape (purple) 1 x 400g ball
  • Woolcraft Aran – 825 Kingfisher tweed (teal) 1 x 400g ball
  • Woolcraft Aran – 837 Pesto (lime) 1 x 400g ball
  • Woolcraft Aran – 491 Starling (cream) 1 x 400g ball

Each 400g ball made up four squares.

This is the stitch pattern I used for each piece:

bobble-blanket-pattern

The chain row is a multiple of 4 plus 3 (I used 44 ch plus 3 ch).
On the first row the ch 3 and the first tr are in the same stitch, so this will give you an extra stitch (for me this was 48st)

Beginning row – Ch 47 (or any multiple of 4 + 3)
Row 1 – tr in 4th ch from hook, tr to end, ch1, turn (48st)
Row 2 – 2 dc, [1 bobble, 3 dc] repeat until last 3 stitches, 1 bobble, 2 dc.
Row 3 –  ch 3 (counts as first tr), tr in next st to end, ch 1, turn.
Row 4 – 4 dc, [1 bobble, 3 dc] repeat to end, 1 dc in last stitch.
Row 5 – ch 3 (counts as first tr), tr in next st to end, ch 1, turn.

Repeat rows 2-5 x 8 times (this will give you 9 rows with four bobbles and 8 rows with three bobbles), fasten off.crochet-bobble-blanket1

Once I had completed 36 squares I joined them together using a dc stitch in a contrasting cream colour.crochet-bobble-blanket-corner

To finish off I created a simple border. I made this up as I went along but if I recall correctly I did one row of dc and one row of tr in cream, one row of dc in light grey and finally a row of htr in dark grey.crochet-bobble-blanket3

And this is the finished item. It is sooo warm, just need some cold weather now! #readyforwinter